

Virtual Design Measurement Guide
-
Step 1: Sketch the Room
Draw the shape of the room’s footprint as best as you are able to.
Measure the ceiling height and write it in the center using feet and inches (example: 8'6")
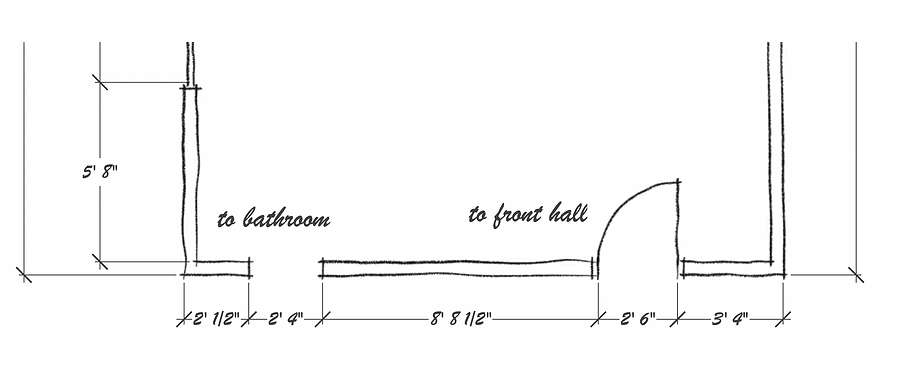
Measure the full length of each of the room’s walls from end to end and write the measurement on the paper next to each of the walls, like below.
Draw the location of doors and windows on each wall with the direction of the door swing.
-
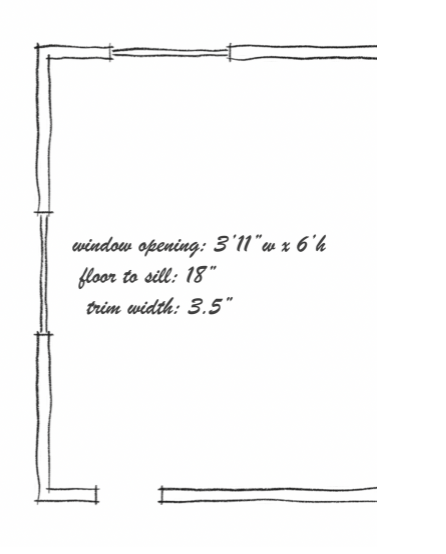
Step 2: Measure
Measure each door and window from inside the trim to inside trim around it (do not include the width of the trim in this measurement - imagine that as part of the wall). Also note the width of the trim.
Measure also the height of each opening and note this to the side of the opening. If it’s a window, measure also from the floor to the top of the window sill.
Measure the wall space to the right and left of each opening from inside trim to corner (or, if theres another opening, measure inside trim to inside trim) and write those measurements by the wall area they refer to.


Virtual Design Photo Guide
Shoot from every corner straight across to the opposite corner.
Shoot from the middle of every wall straight across to the middle of the opposite wall.
Shoot wide shots with mostly horizontal photos to show as much of the room in each photo as possible. We need to see how your space relates to other walls, doors, hallways, etc.
Shoot a couple vertical photos to show ceiling fixtures and/or height of tall ceilings.
Take a photo of furniture you want to keep in the room.
Too many is better than not enough!
Once you have completed images and sketches, please upload to Google drive and email to claire@clairebrodydesigns.com
